
How to Clean And Paint A Cement Floor in ONE day!
This weekend we had a small task to spruce up our carport that we will share with you how to clean and paint a cement floor in one day. If you have even cleaned and painted cement / concrete floor you know it can be a headache. Hopefully this shortcut will cut down on the amount of time you need to spend to paint it properly.
However note: this process is for areas that you KNOW do not have grease or other automotive fluids on them. You would need soap or solvent to be used with a pressure washer for removing oil or fluids prior to painting. Otherwise the paint will not properly adhere to the cement and you will need to start over again.
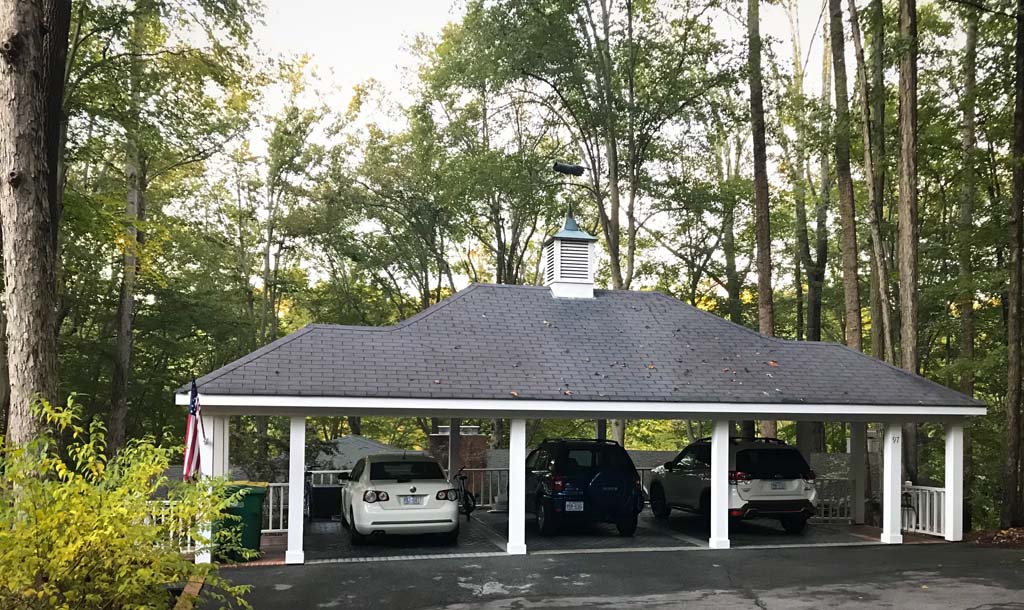
Our carports cement floor is made up of 2 surfaces. Brick and stamped concrete in two patterns. 1. A cobblestone pattern where the cars park. 2. A rectangular edging that goes between the 3 parking spots and near the driveway edge. The center of the carport paint might need some touch up soon, however the lighter color rectangular edge needs paint today! This is due to the tires of our vehicles going in and out and it is exposed to the sun and rain more.
The other thing to mention, this carport is somewhat special. It is a stand alone structure from our house. It is trimmed in white and has multiple angles on the roof line and a frequent conversation piece by visitors. Standing at the top of the carport is a pagoda with a wind vane or aka weather vane. Ours is a pointing hand weather vane that tells us which direction the wind is heading today.
Weathervane – In use for centuries, these are the type often seen on top of barns, cathedrals, and a variety of other buildings. Since weathervanes are also used for decorative purposes (in addition to functional applications), they can take on a variety of shapes and styles. The classic style features a fin in the shape of a rooster, but a variety of other fin shapes can be featured. They can include the silhouette of a noteworthy person, a ship, fish, tractor, or a simple arrow.
– Found on Acurite
Today’s task will be the steps to clean and prep the surface for painting. The good news this project can be pretty simple if you don’t have to worry about oil or antifreeze as mentioned earlier. These simple steps will help you complete the job in no time at all.
Supply List To Clean and Paint A Cement Floor
- Floor Paint – 1 gal. Slate Gray Self-Priming Epoxy Satin Interior/Exterior Concrete and Garage Floor Paint
- Hard bristle wooden brush
- Cordless Drill
- Wire brush attachment
- Leaf Blower
Close up of missing and worn paint on our carport floor.
Steps on how to Clean And Paint A Cement Floor
Total Time: 2 hours
Clean and Prep
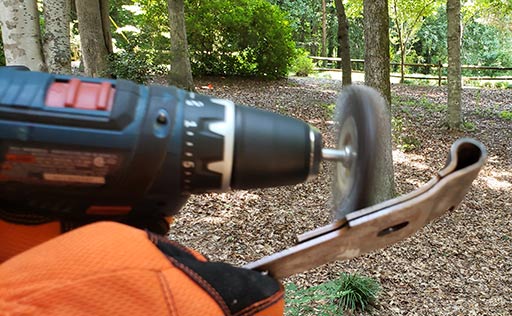
I used my cordless drill and wire brush for cleaning the Farm House Style Deck Gate hardware, and for this project. Use the drill and brush to remove any loose paint. We also due to rain had some build up of dirt. This really helped to loosen that sediment. Now grab your Leaf Blower and blow off the surface. This is step one in this process.
Brush & Leaf Blower
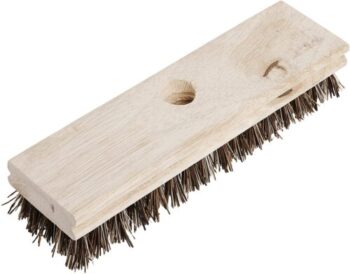
Now use a pole and a wooden floor brush to go over the entire surface. I found scrubbing the surface while someone else had the blower was most effective in removing all debris. You can also use a pressure washer for this activity however, it will take a little more prep time (add a day to dry out properly) to the process. However we want to accomplish this in one day so we won’t use this method.
Start to paint
Start to pain the surface. Keep an even stroke and do not over saturate your brush. With this type of paint / epoxy it will self level so less is more. Also, you will need to do two coats for the best possible coverage. Take your time and make sure to not get the paint in areas that you don’t need it to be painted. You can always mask off the area as needed.
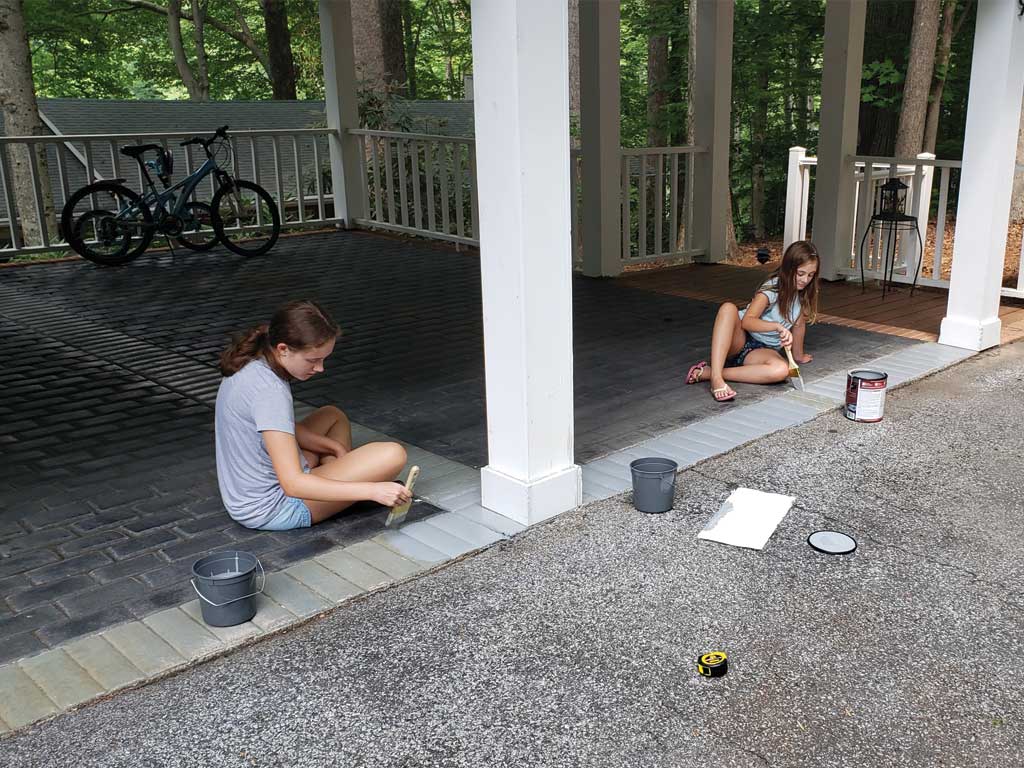
Start to paint the edges
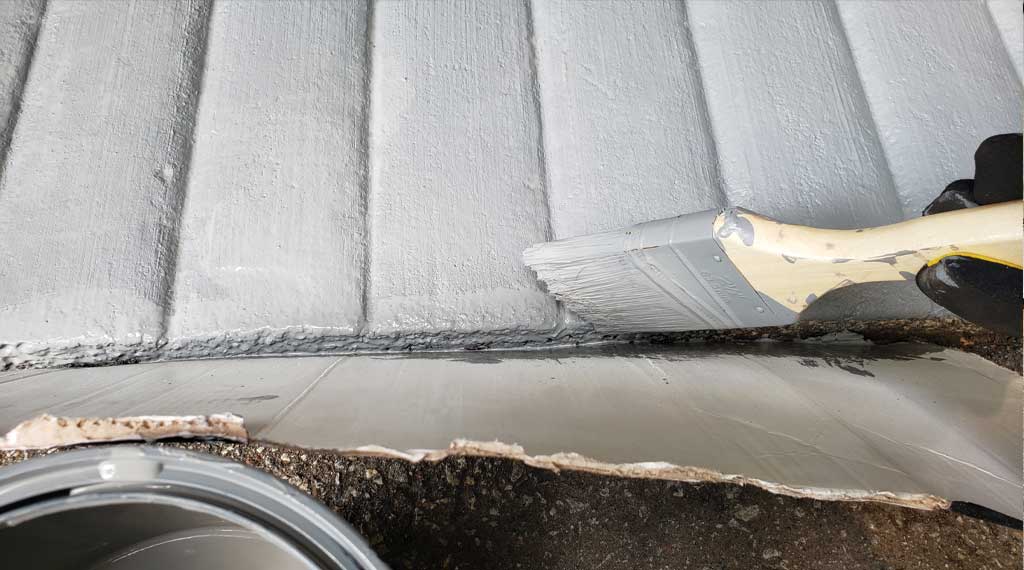
I used a old piece of a box to simply block off the edges and not get paint on areas that do not need the lighter paint on them. If you have already done a second coat of paint on the main section of your job, this should be a one coat process. I found that overall the edges were just fine with one coat. If you need a harder line you can use tape to mark off the area.
Dry Time

Now that you have painted the floor, you will need to wait for some time prior to it being dry.
– Foot traffic we found that 2 hours was good enough.
– Car traffic I would say 4 hours (IF YOU ARE NOT PARKING ON IT). We only needed to drive over it for 2 seconds.
– Car Parking would be more like a day or 3. Again it depends on a couple of things. How dry is it outside? Do you drive your car for many miles and are the tires hot? The can of paint from Home Depot recommended 7 days total drying time if you were parking on the surface. So if you want to keep to the instructions, prepare to leave your vehicles parked outside for some time.
This was a pretty easy project overall. It did not break the bank (around $50) and it looked great! An easy job to keep the kids off of an electronic device and spending time working and talking together. What a great win!
Project Costs
- Paint: $39
- Brush’s $15
Thank you for stopping by, we appreciate the support and interest in our little home and family.
Until next time!

