Easy DIY Chimney Crown Repair with ChimneyRX
One of the items during the initial inspection was a repair to the Chimney Cap Flue and Crown. The crown was in need of resurfacing and the two flue caps had holes in them from years of service. Like many of my projects, if I can spend just a little more to get the next level of quality that is my primary objective. Something a little nicer. The good news Chimney Crown repair is something anyone can do. With brush-able crown repair ChimneyRX it is easy to apply, durable and requires no mixing or special bonding agents. It can be used with multiple chimney crowns with small cracks to slightly larger repairs.

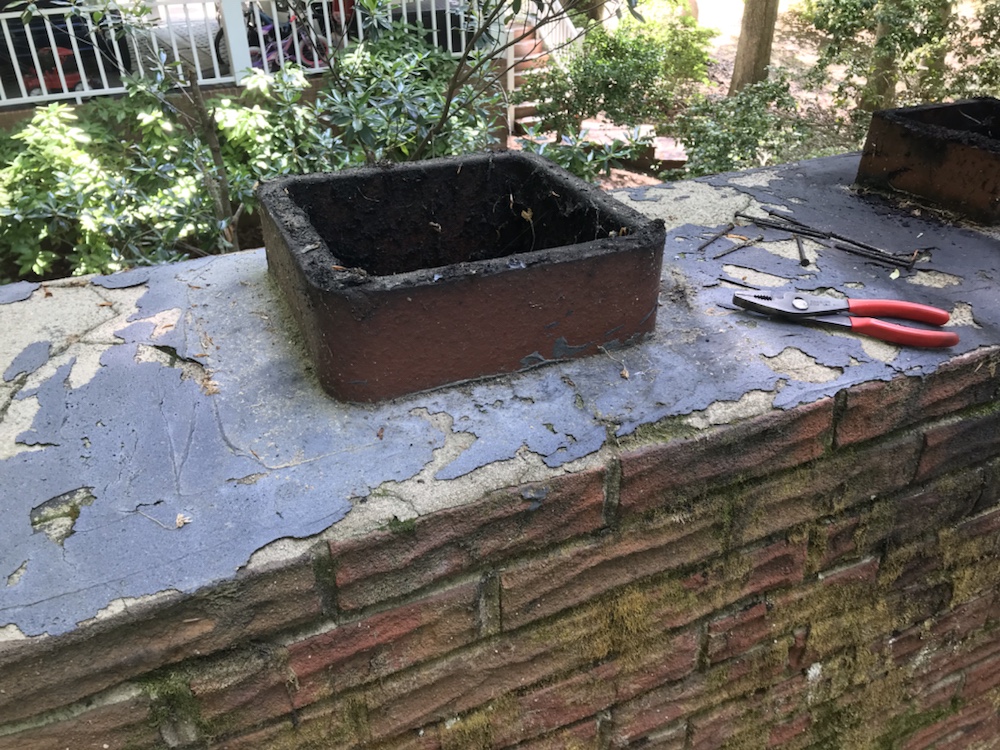
My oldest daughter was brave enough to help out on this project. She has never been on the roof but we figured out she was not afraid of heights. So up to the roof we went. As you can see below the crown was really in need of repair. Don’t forget you will need a pair of pliers or channel locks to remove the old chimney flue cap!

I purchased a BBQ brush and scraper at the dollar store and a semi decent paint brush. It is very thick paint that seems to be half cement and half latex paint. The brand is ChimneyRX – Brush-able Crown Repair. An EXCELLENT product that specifically formulated to repair and protect chimney crowns from water intrusion and ensure structural integrity.

Here is Chimney Rx’s Instruction Video
Follow these steps to repair your masonry chimney crown

A quick note on repairing your Chimney Crown with ChimneyRX. They don’t recommend using the product to repair deep cracks. If you need to repair the concrete then you will need in addition to buy some concrete repair.
(Minutes) 45 minutes
-
Remove Old Chimney Caps.
Remove (if you have them) the old chimney caps. If you will discard them and not reuse just chuck them down to the ground to get them out of the way.
-
Brush Masonry Crown Surface
Get a BBQ Brush with a scraping head. You can find these at the dollar store or here on Amazon. Now take out the BBQ brush and start to brush the crown from end to end.
-
Remove Loose Masonry / Concrete
Use the scraper to remove old semi loose concrete and in my case the old paint.
-
Blow off the Crown Surface
Blow off the remaining dust and dirt once you have ran the scraper.
-
Prep your Paint Brush
Get a decent paint brush. It does not need to be a fancy high end brush but something that is clean and has good bristles. I went for a 2.5 inch wide brush for the Chimney RX and it worked fine. Don’t worry about having a brand new brush either. Use an older one that is about done with life. It will not be usable after this process.
-
Brush on and Apply ChimneyRX to the Masonry
Open the container of ChimneyRX – Brushable Crown Repair. find a central spot and slowly pour the paint onto the crown. Start with a little and work the paint into the crown. Keep in mind it is very thick but goes on easily. Use long even strokes and it will look like new concrete when done! Make sure to pay attention to the ends so you don’t paint the side of the chimney.
-
Drying and Curing
Now let it dry thoroughly. It says cure time is roughly 2-4 hours but I needed to let it sit for a little more than a day.
ChimneyRx Brushable Crown Repair is a fast setting elastomeric coating that forms a flexible waterproof membrane. It’s specifically formulated to repair and protect chimney crowns from water intrusion.
Source: ChimneyRX
ChimneyRx Brushable Crown Repair is a masonry chimney crown repair product that is easy to apply with a 3″ or 4″ paint brush. It’s very durable and requires no mixing or special bonding agents. The compounds are all solvent-free and will not harm the environment.
It completely cures in 2-4 hours depending on the temperature and humidity and covers approximately 40 square feet per gallon.


Once done, you will be very happy with the results. I know I am.. total time (outside of drying time) was roughly 4.5 hours mainly due to the crown not being 100% dry. Also a second coat in a couple of spots would not be a bad idea. This product seems like it will hold up well, and it was relatively simple process. It will keep your crown looking great for years to come.
Up next we will start to tackle putting on a stainless steel chimney cap. This is an easy and value added product to keep your chimney maintained and ready for the next wind, rain and snow storm.
Other products:
– 2000-2021 Home Depot product authority llc
Mel and I appreciate you going along on this journey with us and we hope you enjoyed this post. If you want to get in touch with us, leave a comment below or use the contact us form. We are always looking for feedback, ideas and your questions on our projects.
Until next time!


