

Chimney Cap Installation in 30 Minutes
Chimney cap installation may seem like a task you can’t tackle, but if you plan accordingly you will see you can. One of the items during the initial inspection of our house was a repair to the Chimney Cap and Crown. In the previous post, I talked about repairing the chimney crown using a product called Chimney RX Crown Repair. An excellent product that is working out great . The crown is the top of the chimney that typically has concrete as the main surface and where the flu exit is. Today we are going to talk about the Chimney Cap. One thing to note on this “Do it yourself”, like many of my projects are easy enough that anyone with basic skills can do. My only caution is if you don’t like heights and don’t like ladders, this project may not be for you. Hire a professional or bribe a friend or sibling.
Chimney Cap Installation – Finding the Right One
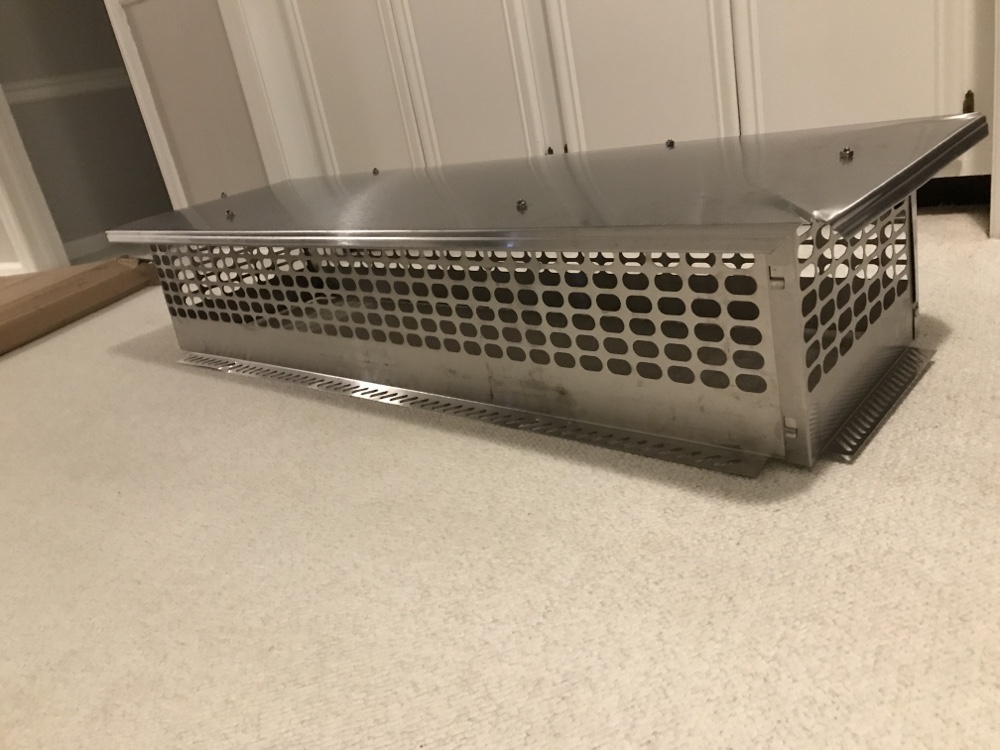
Instead of replacing the old black painted steal units (2), I found a full width stainless steal unit that I have seen on houses in our area. In my opinion, they just look nicer. Stainless steal won’t rust out for generations and resist moss and other organic growth on them. In order to archive the look I was shooting for, I wanted to find a single unit that could span across both flues and over the majority of the brick.
The largest of the two flues measured 13×13 and the smaller flu was 10×10. The length was 38 inches from the outside end to the outside of the other flu. I lucked out and found a 13×49 inch “The Forever Cap Multi Flu Stainless Steel Crown Mount Chimney Cap” This allowed for me to center the stainless flu cap on the entire chimney. Our flues were NOT centered so in order to make it somewhat symmetrical I needed a larger cap. SOME companies (as in the video below) recommend an entire cap of the Crown. However in my case that would look rather odd as it would have to be huge.
When we got the cap, it was easy to assemble and it literally took 5 minutes from the box, to reading the instructions and fitting it together. There was one small bend that I needed a hammer to tweak one of the tabs but no big deal at all. just assemble the pieces and use a 10 MM ratchet to tighten down 4 nuts.
Proper Selection of a Chimney Cap Video
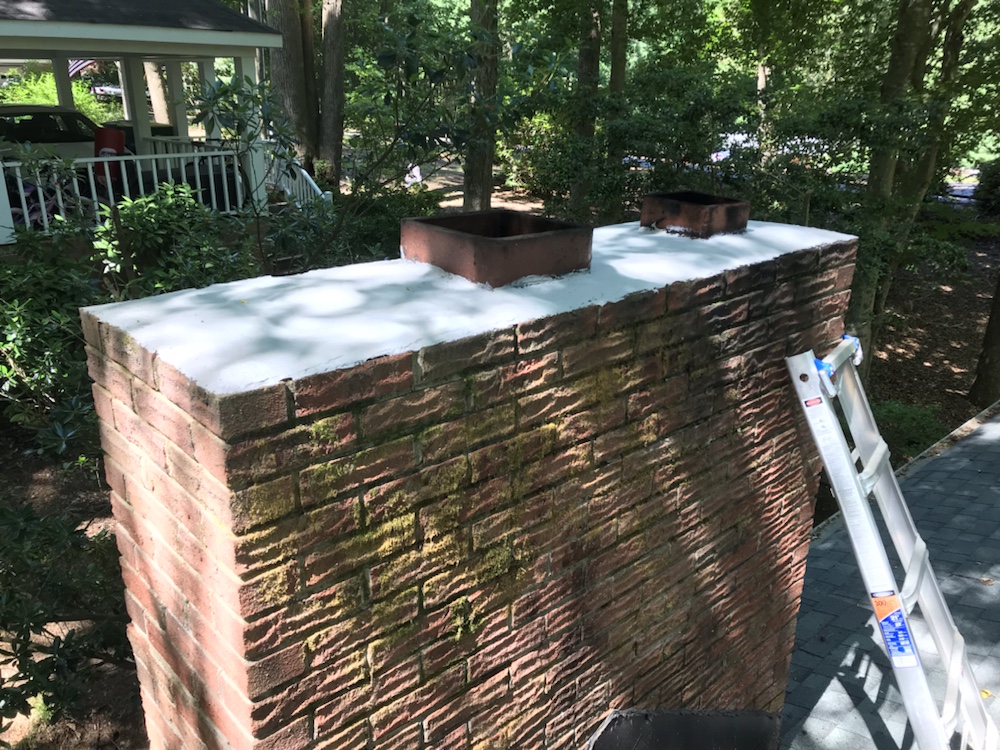
As I stated earlier the crown was in desperate need of repair. We took care of that part in no time.
Steps to Replace Your Chimney Cap
Installation of this Forever Cap Chimney Cap is a snap, follow these steps and you are on your way to having this unit installed. Note, I did not opt to find a cap that covered the whole crown as I did not want to have it so overpowering. However, if you can as the video suggests it would be a good idea to cover the entire crown.
Time to Insatall 35 minutes
-
What you will need
You will need a drill and a set of cement anchor screws. A screw driver and or a socket set to secure the anchors properly. Finally your chimney cap.
-
Order and assemble your chimney cap
-
Align Cap
Center and align the Cap on top of the flu. Keep in mind account for Front to back and side to side. Depending on your home, you may want to have someone help you also visually align the cap.
-
Drill Holes
Once satisfied, drill several holes into the crown using the stainless edge keepers as a guide.
-
Secure Bolts
Secure your bolts into the crown. Depending you may want to include a dab or two of silicone into the hole.
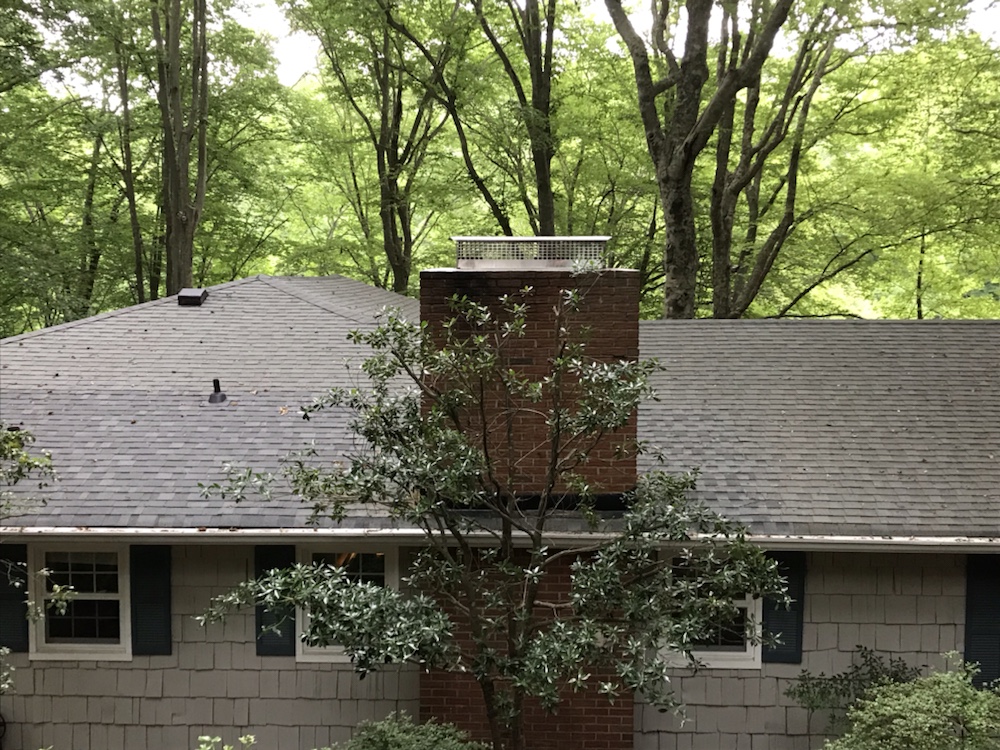
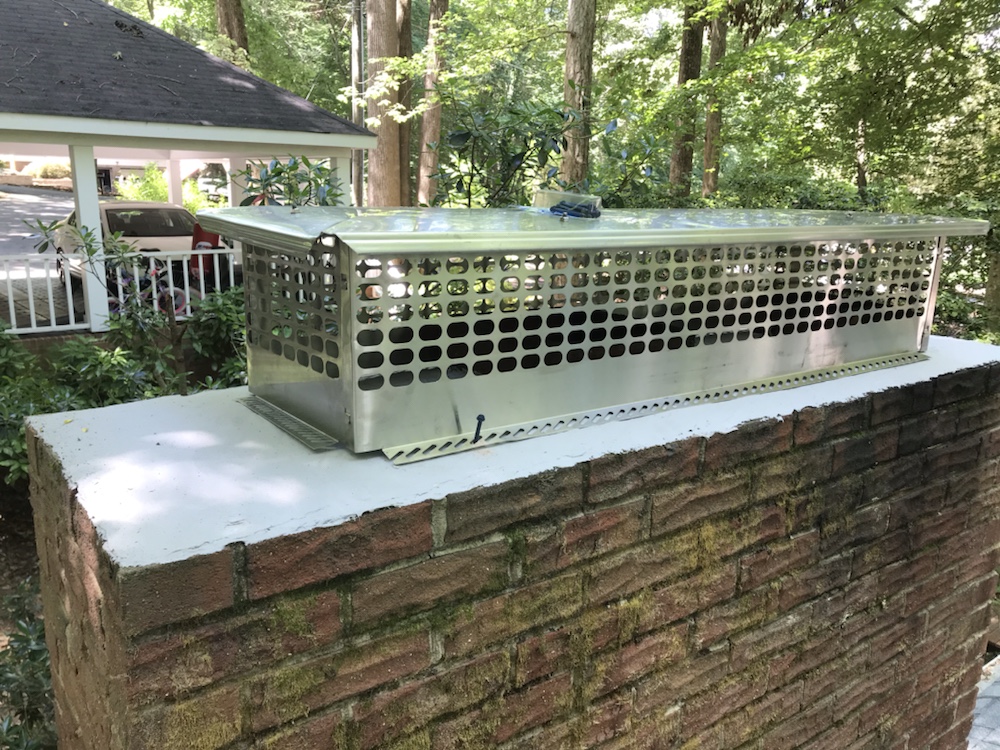
Once done, you will be very happy with the results. This cleaned up the appearance of our home as the old ones were unsightly Now it looks much better when you pull into our carport. Not only did it not look nice it was actually leaking water down the chimney. One year later, it still looks nice and you really can’t tell the difference (still looks like new).
A relatively simple job that will last for years to come.
How to and Can I install a chimney cap?
Chimney cap installation can be done by the common Di Yer. The process is relatively simple and if you can handle heights, a drill and a wrench there is absolutely no reason why you can’t get it done.
How much to install chimney cap?
Including the chimney cap, a typical chimney cap installation will run you in the range of $600 to well over $2,000 for very large high end chimney caps. For our project, this cap cost $299 so you can save yourself some cash if you can tackle yourself.
Who can install a Chimney cap?
Check with your local town and city to see if you need any type of building / modification permit. Overall, you should be good to go for doing this work yourself. If you are replacing, I am going to guess you should be OK.
Thanks for stopping by. Joe and Mel appreciate you going along on this journey with us and we hope you enjoyed this post. If you want to get in touch with us, leave a comment below or use the contact us form. We are always looking for feedback, ideas and your questions on our projects.
Until next time!

